If you’re looking for strong and stable shoulders, dialed-in technique, laser focus, improved grip strength, and an incredible lesson in tension, the bottoms-up kettlebell position might just be your new favorite thing!
 What Does Bottoms-Up Mean?
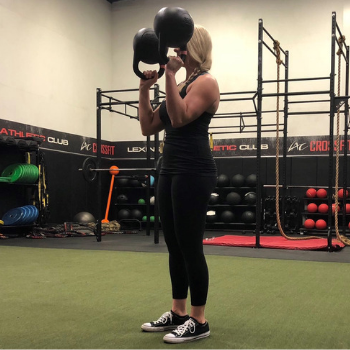
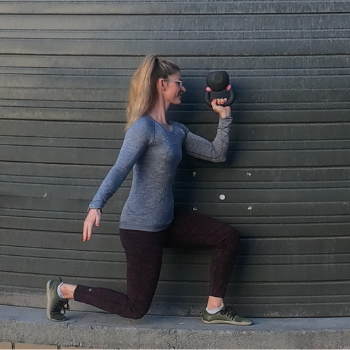
The bottoms-up position refers to a kettlebell held vertically by the handle with the bottom of the kettlebell facing up and the handle on the bottom — hence the name “bottoms-up.” It might elicit some funny looks from across the gym floor, but the bottoms-up position packs a serious punch.
What Exercises Can Be Performed Bottoms-Up?
The bottoms-up position lends itself well to pressing and carries, as well as any movement you would do with a kettlebell in the rack position (squats, lunges, etc.) or overhead (get ready for the most focused Turkish get-ups you’ve ever done!)
Even ballistic movements like cleans and snatches can be performed in a bottoms-up fashion.
6 Benefits of Bottoms-Up Training
Want more incentives to start working this way? Consider the following:
1. Cultivate Stability and Strength Through Instability
A bottoms-up kettlebell is inherently unstable, and therein lies the magic: to overcome the challenge, a greater number of motor units and muscle fibers are recruited.
You’ll feel the work in the muscles of your rotator cuff, lats, core, wrist and forearm during carries, presses, and more dynamic movements.
2. Sharpen Your Focus and Get Instant Feedback
One of the biggest reasons I love incorporating bottoms-up work in my sessions is the focus that a bottoms-up kettlebell requires. While you can get away with a less-than-great kettlebell press or Turkish get-up when you’re working in the rack position, the bottoms-up position is unforgiving. If you lose your focus and control, that bottoms-up kettlebell is likely to come crashing down.
There’s an additional benefit in the instant feedback received by the bell either staying vertical or flopping over: you’ll know it when you’ve nailed it!
The bottoms-up kettlebell provides clear, instant feedback on whether or not you’re executing the movement well.
 3. Polish Your Positioning
If you’re struggling to dial in your technique for the kettlebell press, a bottoms-up version is a great place to spend some time greasing the groove. The bottoms-up press requires the bell to stay held vertically overhead, demanding a vertical forearm and a smooth path up, led by a strong and stable shoulder. Because of this, the bottoms-up kettlebell press is one of the easiest ways to learn and teach superb pressing mechanics.
While everyone’s body is different, those who struggle with traditional overhead pressing can often find a welcome variation in the bottoms-up kettlebell press. If your shoulders have been less than thrilled in previous attempts, flip over your bell and give the bottoms-up a try!
4. Get a Grip
The bottoms-up kettlebell position challenges the wrists in a different way than most other movements. In most movements that challenge our grip strength, the load is below our grip, as is the case with deadlifts, pull-ups, farmer’s carries, etc.
The bottoms-up position places the load above the grip, providing a novel challenge to the muscles of the wrist and forearm.
5. Perfect Tension and Core Connection
 Learning to ramp up tension (or dial it down) and truly feel the integration of the core musculature with movements like squats, presses, and carries can be challenging for some. The challenge of the bottoms-up position teaches the necessity of “meeting the tension to the task” (a phrase coined by Antony Lo, PT).
Too little tension and the bell is tumbling. Too much and you’ll find it difficult to move (or will fatigue early). For the person looking to master that “Goldilocks” level of tension, bottoms-up kettlebell movements are an excellent tool.
Additionally, most bottoms-up movements are performed unilaterally, further requiring our deep stability system to do its job to keep us upright.
6. Make Use of Light Bells
Dust off those light bells you haven’t used in a while for a bottoms-up Turkish get-up, or overhead press! The degree of difficulty means that you won’t need much load to get a training stimulus.
If you’re somewhere with only light bells available, or you’re simply looking to get more use out of the bells you haven’t used in a while, bottoms-up kettlebell work is a great way to make the most of the range of kettlebells in your collection.
When Are You Ready for Bottoms-Up Work?
Want to get started on bottoms-up training, but not sure you’re up for the task? You might actually be more ready than you think!
Bottoms-up kettlebell training is a self-limiting activity, meaning it requires greater engagement, awareness, and connection. While bottoms-up work might look more advanced, I prefer using it early on in training to build greater awareness, teach the concept of tension, and solidify good habits.
As with anything else, we run into potential issues when we exceed our capacity. Starting to train bottoms-up positioning should be a gradual process aligned with your abilities.
Getting Into the Bottoms-Up Position
Those comfortable with cleans will likely find a clean to the bottoms-up position to be the most comfortable way to get into a bottoms-up position.
For this, you’ll start with the bell in front of you, with the handle turned 90 degrees (parallel to your feet, not perpendicular like a normal clean), hike the bell back, and then clean it so that it lands handle down, bell up.
If you aren’t comfortable cleaning yet, I would recommend curling the bell up to the bottoms-up position assisted by the free hand. Try to keep the bell balanced over your hand, forearm, and elbow, and keep your eyes on the bell at all times.
How to Get Started
Before moving to more advanced bottoms-up training, I invite everyone to feel solid in a bottoms-up hold with a light bell. You’ll want to clean or curl the kettlebell into the bottoms-up position and practice standing there with the bell held in its vertical position.
 Consider this as you might a plank: start with 10 or so seconds and aim to work your way up to being able to breathe and balance the bell for 30–45 seconds each side before adding more complexity.
Once someone is proficient at isometrically controlling the bell in a standing position, I like to add the challenge of marching, walking, pressing, and squatting the bottoms-up bell (remember: any movement that is performed with a kettlebell in the rack or overhead position can be done bottoms-up!).
It can be tempting to jump straight to flashier movements with heavier bells, but remember that the benefits of bottoms-up movements are in the finer details; give yourself ample time to build the strength and skill and prioritize quality over quantity and load.
If you’re looking for a new challenge, you don’t necessarily need new equipment. Just flip that kettlebell bottoms-up!
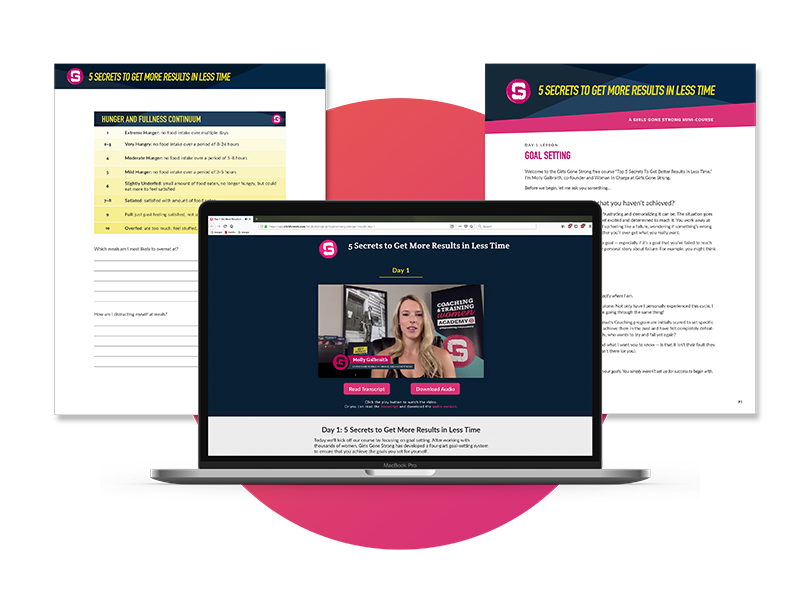
FREE course – 5 SECRETS TO GET MORE RESULTS IN LESS TIME
Learn the most effective strategies for getting the exact results you want — without spending your life in the gym.
Our Girls Gone Strong Formula has helped thousands of women all over the globe get the results they’re looking for.
Now we’re sharing our secrets with you. Click the button below to get your first free lesson
stand the Blueprint and be willing to trust the process.